
Answer ID: 1000591 | Access Level: Everyone | Updated: 04/10/2023 08:45 AM
Flex systems have the ability to load a custom user project created in VTPro. This project can be something as simple as controlling a PTZ camera up to controlling an entire room system - i.e. Lighting, Drapes, etc.
For simple camera PTZ and Preset controls, VTPro has built-in reserve joins that can be used, eliminating the need for a control system. Download the example VTPro project attached to this OLH for reference on how to use reserved joins for a Flex system.
For more complete systems that require controlling room environment devices or video switching, a control system will need to be added to the system and programmed using SIMPL Windows.
Below are instructions for loading the custom project onto Flex.
NOTE - When using a project that only utilizes reserved joins and doesn't need a control processor, steps provided below for setting the IP Table is not needed.
| Smart Graphics - Loading UI & Configuring IP Table With Crestron Toolbox (↑ Back to Top) |
Loading a Smart Graphics Project with Crestron Toolbox
- Connect to UC-Engine in System Information
- Click the Play Button on Display Project box
- In the new window, Click Browse and select the VTZ file.
- Click the send button to load project to the UC-Engine

Setting Up IP-Table for Crestron Room Control with Crestron Toolbox
- Connect to UC-Engine in System Information
- Click the Play Button on IP Table box which will open IP Table Setup window
- Click Add Entry which will open IP Table Entry
- Select the IP ID and enter the IP Address/Hostname of the processor then click OK
- Verify the new entry in the IP Table Setup Window then click Send To Device**

| Smart Graphics - Loading UI & Configuring IP Table Without Crestron Toolbox (↑ Back to Top) |
- Select the More button from the Teams Room Interface.
- Select the Settings menu.
- Select "Windows Settings" to access log in screen.
- Select Administrator on the lower left (Default password will be "sfb")
- Once logged into the Windows 10 admin user, Search for and select "Crestron Settings" from the start menu.
- Select Load Project:
- Load a VTZ file to an empty USB stick,
- Connect the USB stick to a USB port on the UC-Engine and select Load New; this will allow you to browse to the USB stick and select the file to add to the TSW-1060/Mercury for room control.
Setting Up IP-Table for Crestron Room Control without Crestron Toolbox
- Select "IP Table" in the Crestron Settings Menu.
- IP_ID should be set to match the Simpl Programming Code.
- Type(Gway): Default Gateway
- IP Address / Hostname of Crestron Controller
- Device Id: Default Blank
- Select add to add the IP table to the processor
- Select remove to remove the IP table to the processor
- Select Update Selected if modifying a current IP table
- Automatically Discover and respond: Default On
- Allow multiple IP tables: Default On
| Smart Graphics - Accessing UI from Teams Interface |
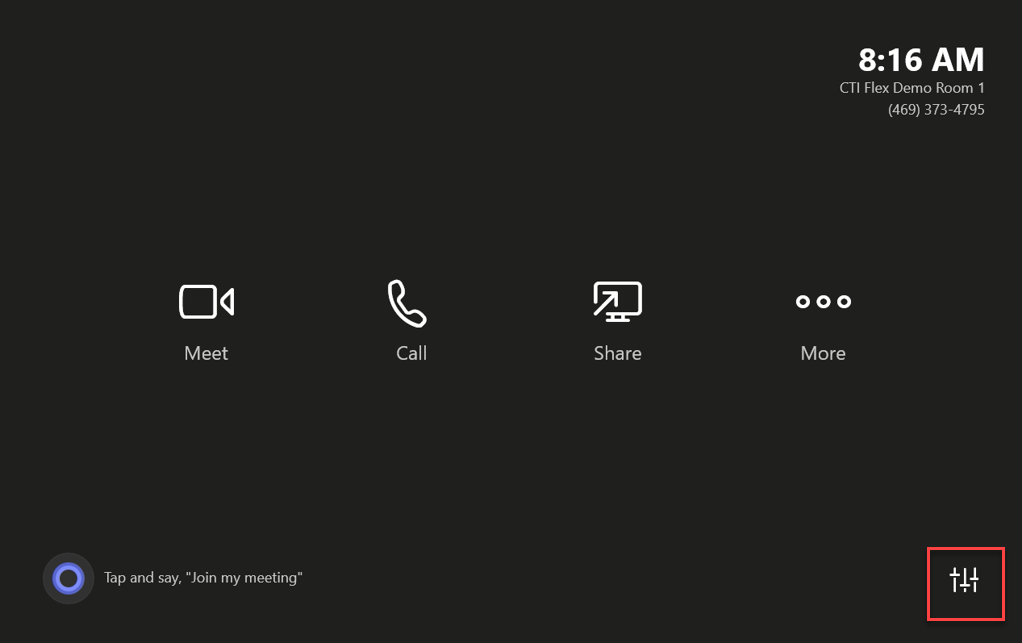
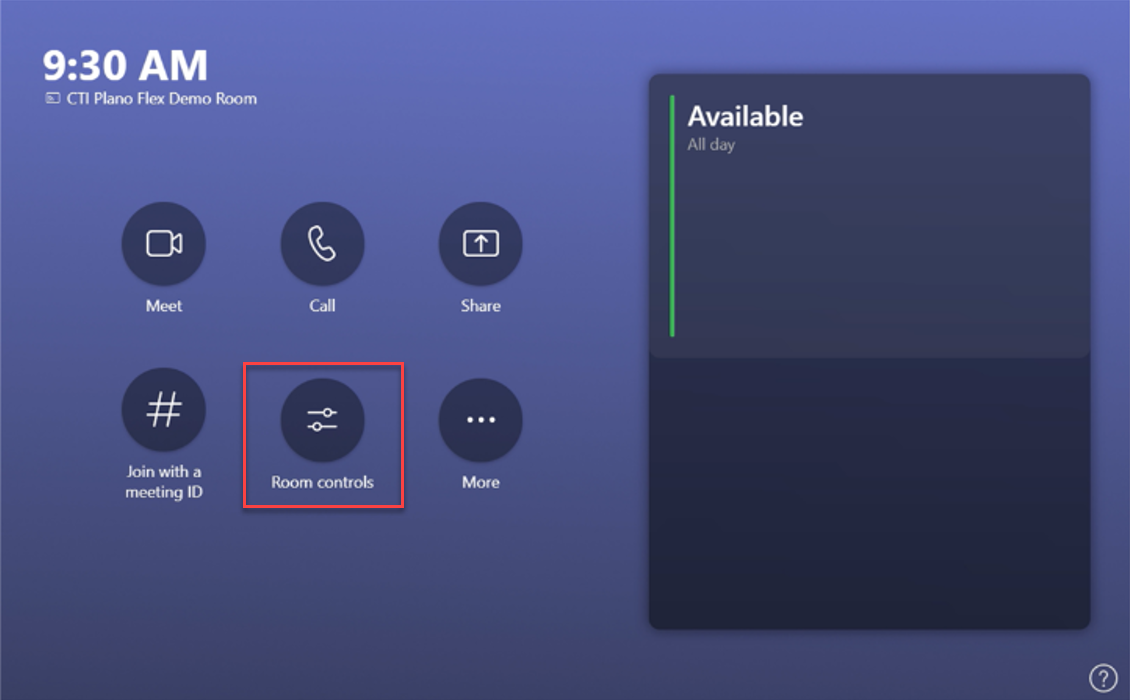
Once successfully configured a new button (icon of three sliders) appears on the Teams interface. Clicking this button flips to the Smart Graphics Project.
Accessing Smart Graphics from Home Screen on Teams Room Systems running version 4.3.33 or newer
Accessing Smart Graphics from Home Screen on Teams Room Systems running version 4.3.33 or newer
Teams Rooms New Experience opt-in version 4.16.40.0
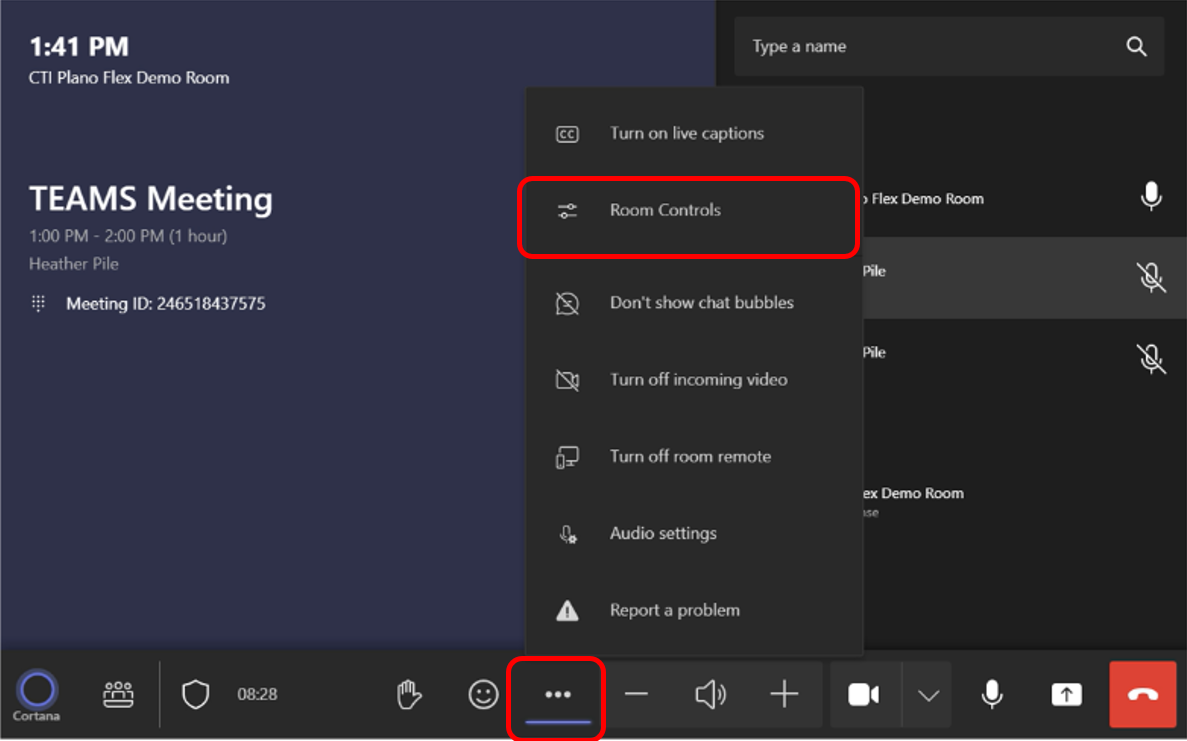
Accessing Smart Graphics while in a call on Teams Rooms Systems
Pressing on the black border that exists around the Smart Graphics project returns the user to the Teams interface
Attachments
- File Type vtpCustomProjectExample_v1.vtp (522.33 KB)
Comments
0 comments
Please sign in to leave a comment.